Features / Settings
Settings.
billWright's Settings area controls your company identity, document appearance, security, backups, and access control in one place.
Records directory
#/directory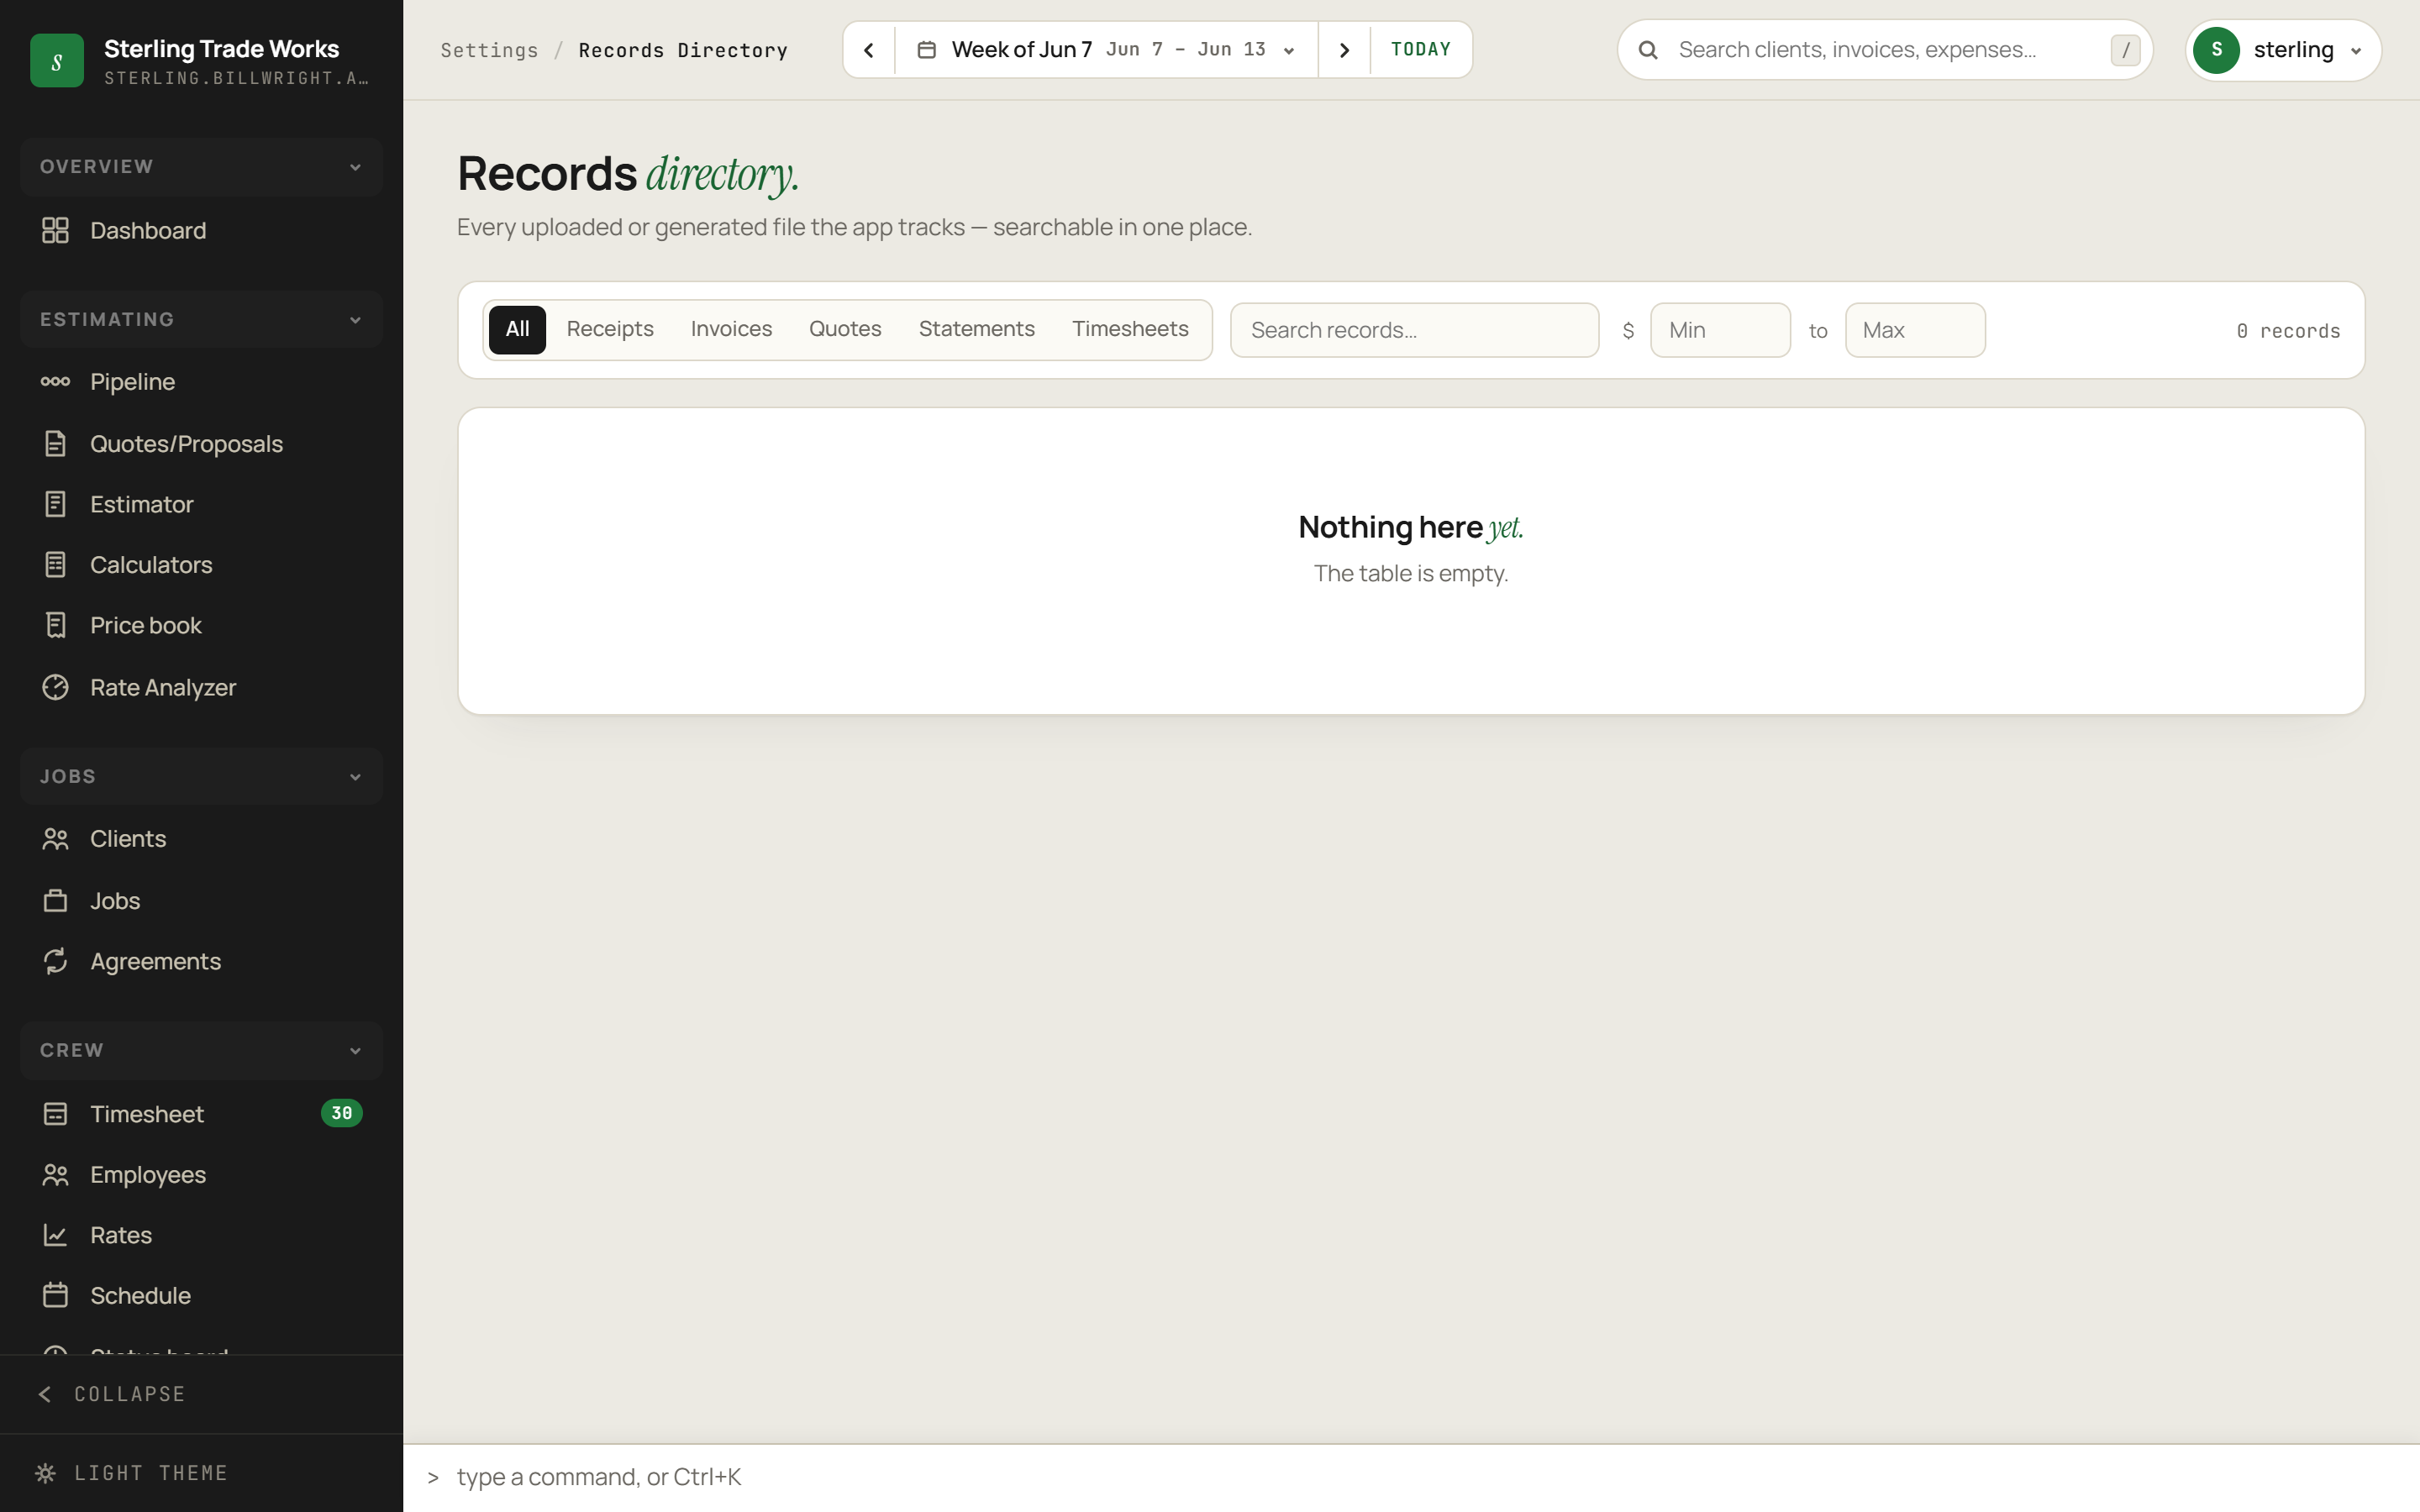
Lists every uploaded or generated file the app tracks - receipts, invoices, quotes, statements, and timesheets - searchable and filterable in one place.
Filter by record kind
- Open the Records directory screen.
- Click one of the kind buttons in the toolbar: All, Receipts, Invoices, Quotes, Statements, or Timesheets. The active button is highlighted.
- The table updates immediately to show only records of that kind.
Search by name or amount
- Type in the Search records field in the toolbar.
- The table filters in real time, matching against the record name and amount value.
Filter by price range
- Enter a dollar amount in the Min field, the Max field, or both.
- The table shows only records whose amount falls within that range.
- Clear either field to remove that bound.
Read the table
The table shows four columns: Name (with a kind icon), Kind (tag), Amount, and Date. Records are sorted by date descending by default. The record count shown in the toolbar updates whenever filters change.
Branding
#/settings/branding
Controls the logo, color, and contact details printed on all quotes and invoices. Changes apply across the app immediately.
Update your business identity
- Navigate to Settings > Branding.
- In the Identity card, fill in or update:
- Business name (the public-facing name on documents)
- Legal name (used for legal and tax contexts)
- Address (printed on docs)
- Phone
- Click Save branding.
Set the accent color
- In the Identity card, scroll to Accent color.
- Click one of the eight preset color swatches, or use the color picker to choose a custom color.
- The hex code shown next to the picker updates as you choose.
- The Live preview panel on the right reflects the chosen color immediately.
- Click Save branding to apply.
Set the timezone
- In the Identity card, scroll to Timezone.
- Choose your timezone from the dropdown. The hint reads: "Your business day boundary. Times are stored safely and shown in this zone. Saves immediately."
Preview and discard changes
- The Live preview panel on the right shows a mini document header that updates as you edit, reflecting the current business name, address, phone, email, and accent color.
- Click Discard changes at any time to revert all unsaved edits.
Document style
#/settings/doc-style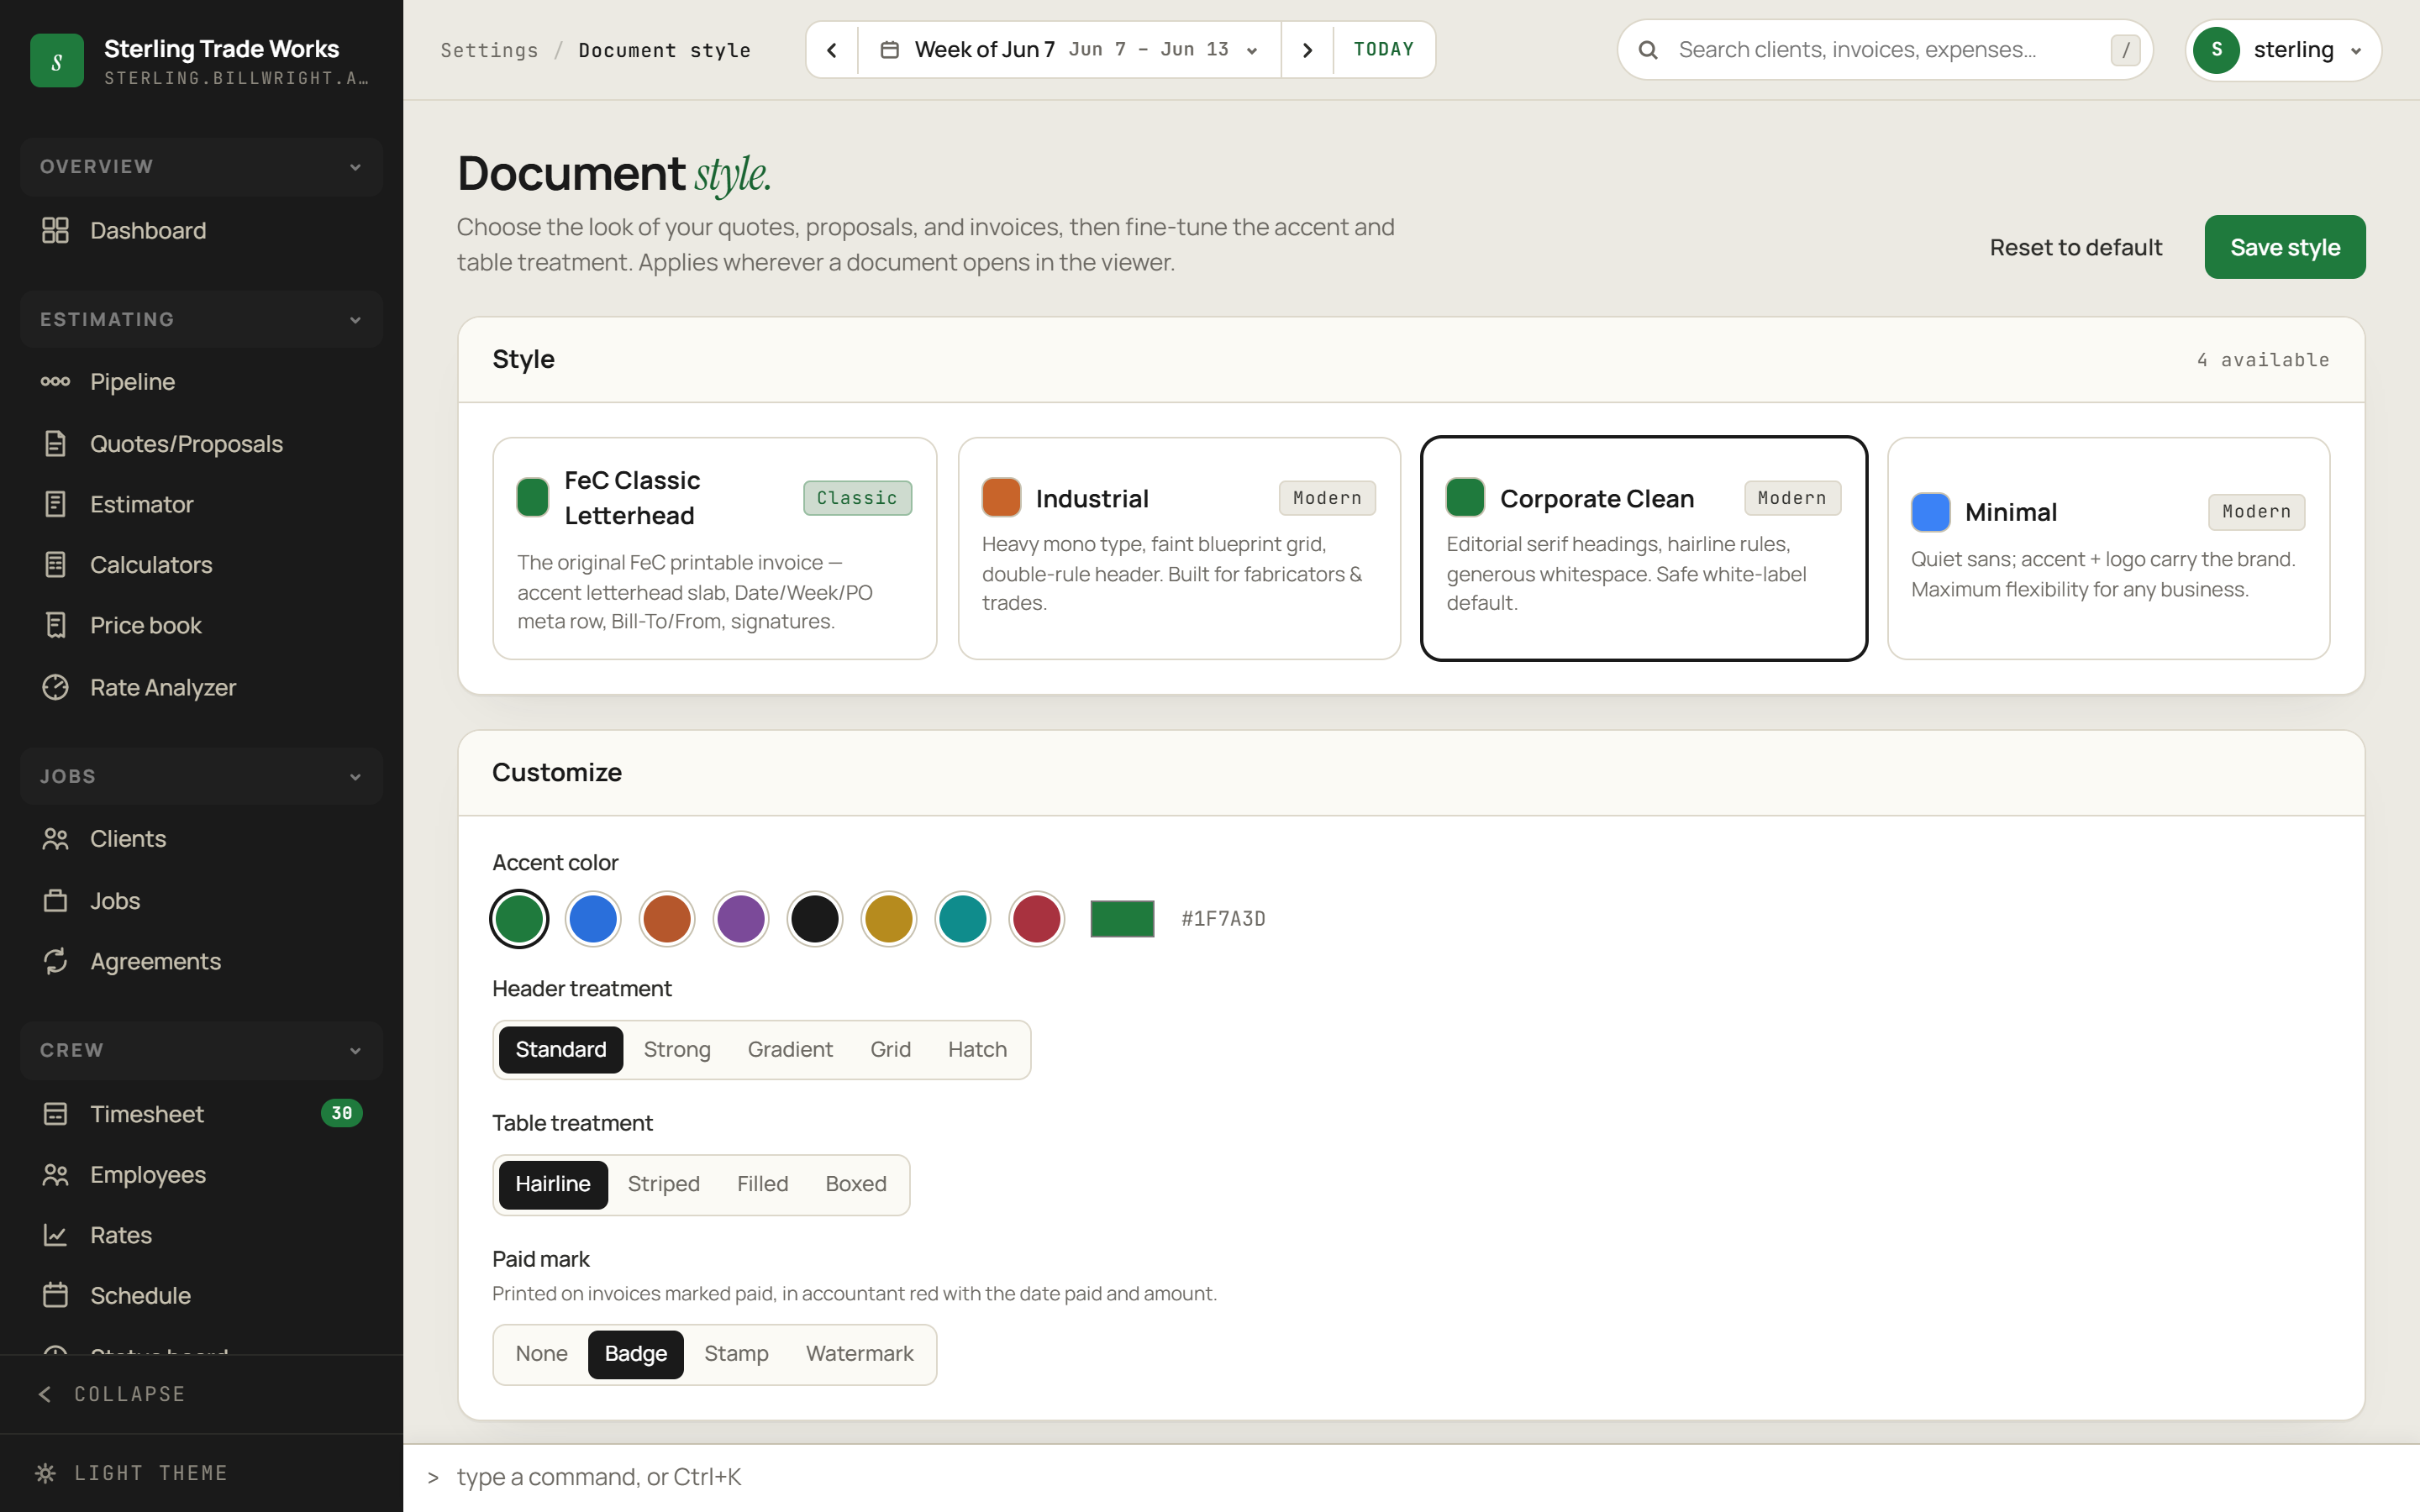
Controls the visual appearance of all quotes, proposals, and invoices in the document viewer.
Choose a base style
- Navigate to Settings > Document style.
- The Style card shows all available document templates as selectable cards. The card header shows the count of available styles.
- Click a style card to select it. The preview updates immediately.
Customize the selected style
- In the Customize card, choose an Accent color from the swatches or color picker. (Available only if the selected style supports accent customization.)
- Choose a Header style: Standard, Strong, Gradient, Grid, or Hatch. (Available only if the selected style supports header customization.)
- Choose a Table style: Hairline, Striped, Filled, or Boxed. (Available only if the selected style supports table customization.)
- Choose a Paid mark treatment for paid invoices: None, Badge, Stamp, or Watermark.
Save or reset
- Click Save style (top right) to apply your choices.
- Click Reset to default (top right) to restore the system default for your account.
Categories
#/settings/categories
Maps expense categories to Schedule C lines and marks each as an expense or cost of goods sold.
View categories
- Navigate to Settings > Categories.
- Parent categories appear at the top level. Subcategories are indented below their parent with an arrow prefix.
- Each row shows: name, Schedule C line and label, kind badge (EXPENSE or COGS, with COGS shown in the accent color), deductible pill (green "Deductible" or red "Non-ded."), an active/archived toggle, and edit and delete icon buttons.
Toggle a category active or archived
- Find the category in the list.
- Click the toggle switch in its row.
- Active: the category appears in pickers throughout the app.
- Archived: hidden from pickers, but its historical data is preserved.
Edit a category
- Click the pencil icon in the category row.
- Make changes in the modal that opens.
- Save.
Delete a category
- Click the trash icon in the category row.
- Confirm the deletion in the dialog that appears.
Snippets
#/settings/snippetsStores reusable text blocks - payment terms, assumptions, disclaimers - that can be dropped into quotes and invoices.
View snippets
- Navigate to Settings > Snippets.
- All saved snippets are listed with their name in bold and body text below it.
Create a snippet
- Click New snippet in the top-right corner.
- In the modal that opens, enter a Name and the Body text.
- Click Create. A toast confirms "Snippet saved" and the list refreshes.
Edit a snippet
- Click the pencil icon on the right side of any snippet row.
- Update the Name or Body in the modal.
- Click Save changes. A toast confirms "Snippet updated."
Delete a snippet
- Click the trash icon on the right side of the snippet row.
- Confirm in the dialog that appears. A toast confirms "Deleted."